

PRO tips to defining curls + coils with expert, Alifia
Expression comes in all forms, and curly + coily hair is the perfect canvas to play with. With so many possibilities, your clients can get stuck on what style to go for. So, check out my starter guide to defining your client’s curls and coils—and making them last out of the salon.
the prep step
The key to a long-lasting look is starting with a clean, detangled hair base. Check out my full wash routine for cleaning curls + coils.
Before you get styling, separate and clip your client’s damp hair into 4 sections to prevent the ends from drying. You can work in horizontal sections for more volume, allowing the curls + coils to stack on top of each other. Or go for diagonal sections for slightly less volume—you do you.
Now pull out your curl product of choice! I like using a curling gel, foam, custard, or cream with a medium hold to lock the style in place. Speaking of styles, this will give you an idea of what styles your clients could rock.
Nice. Now that you know what kind of looks you can create, here’s how to bring them to life.
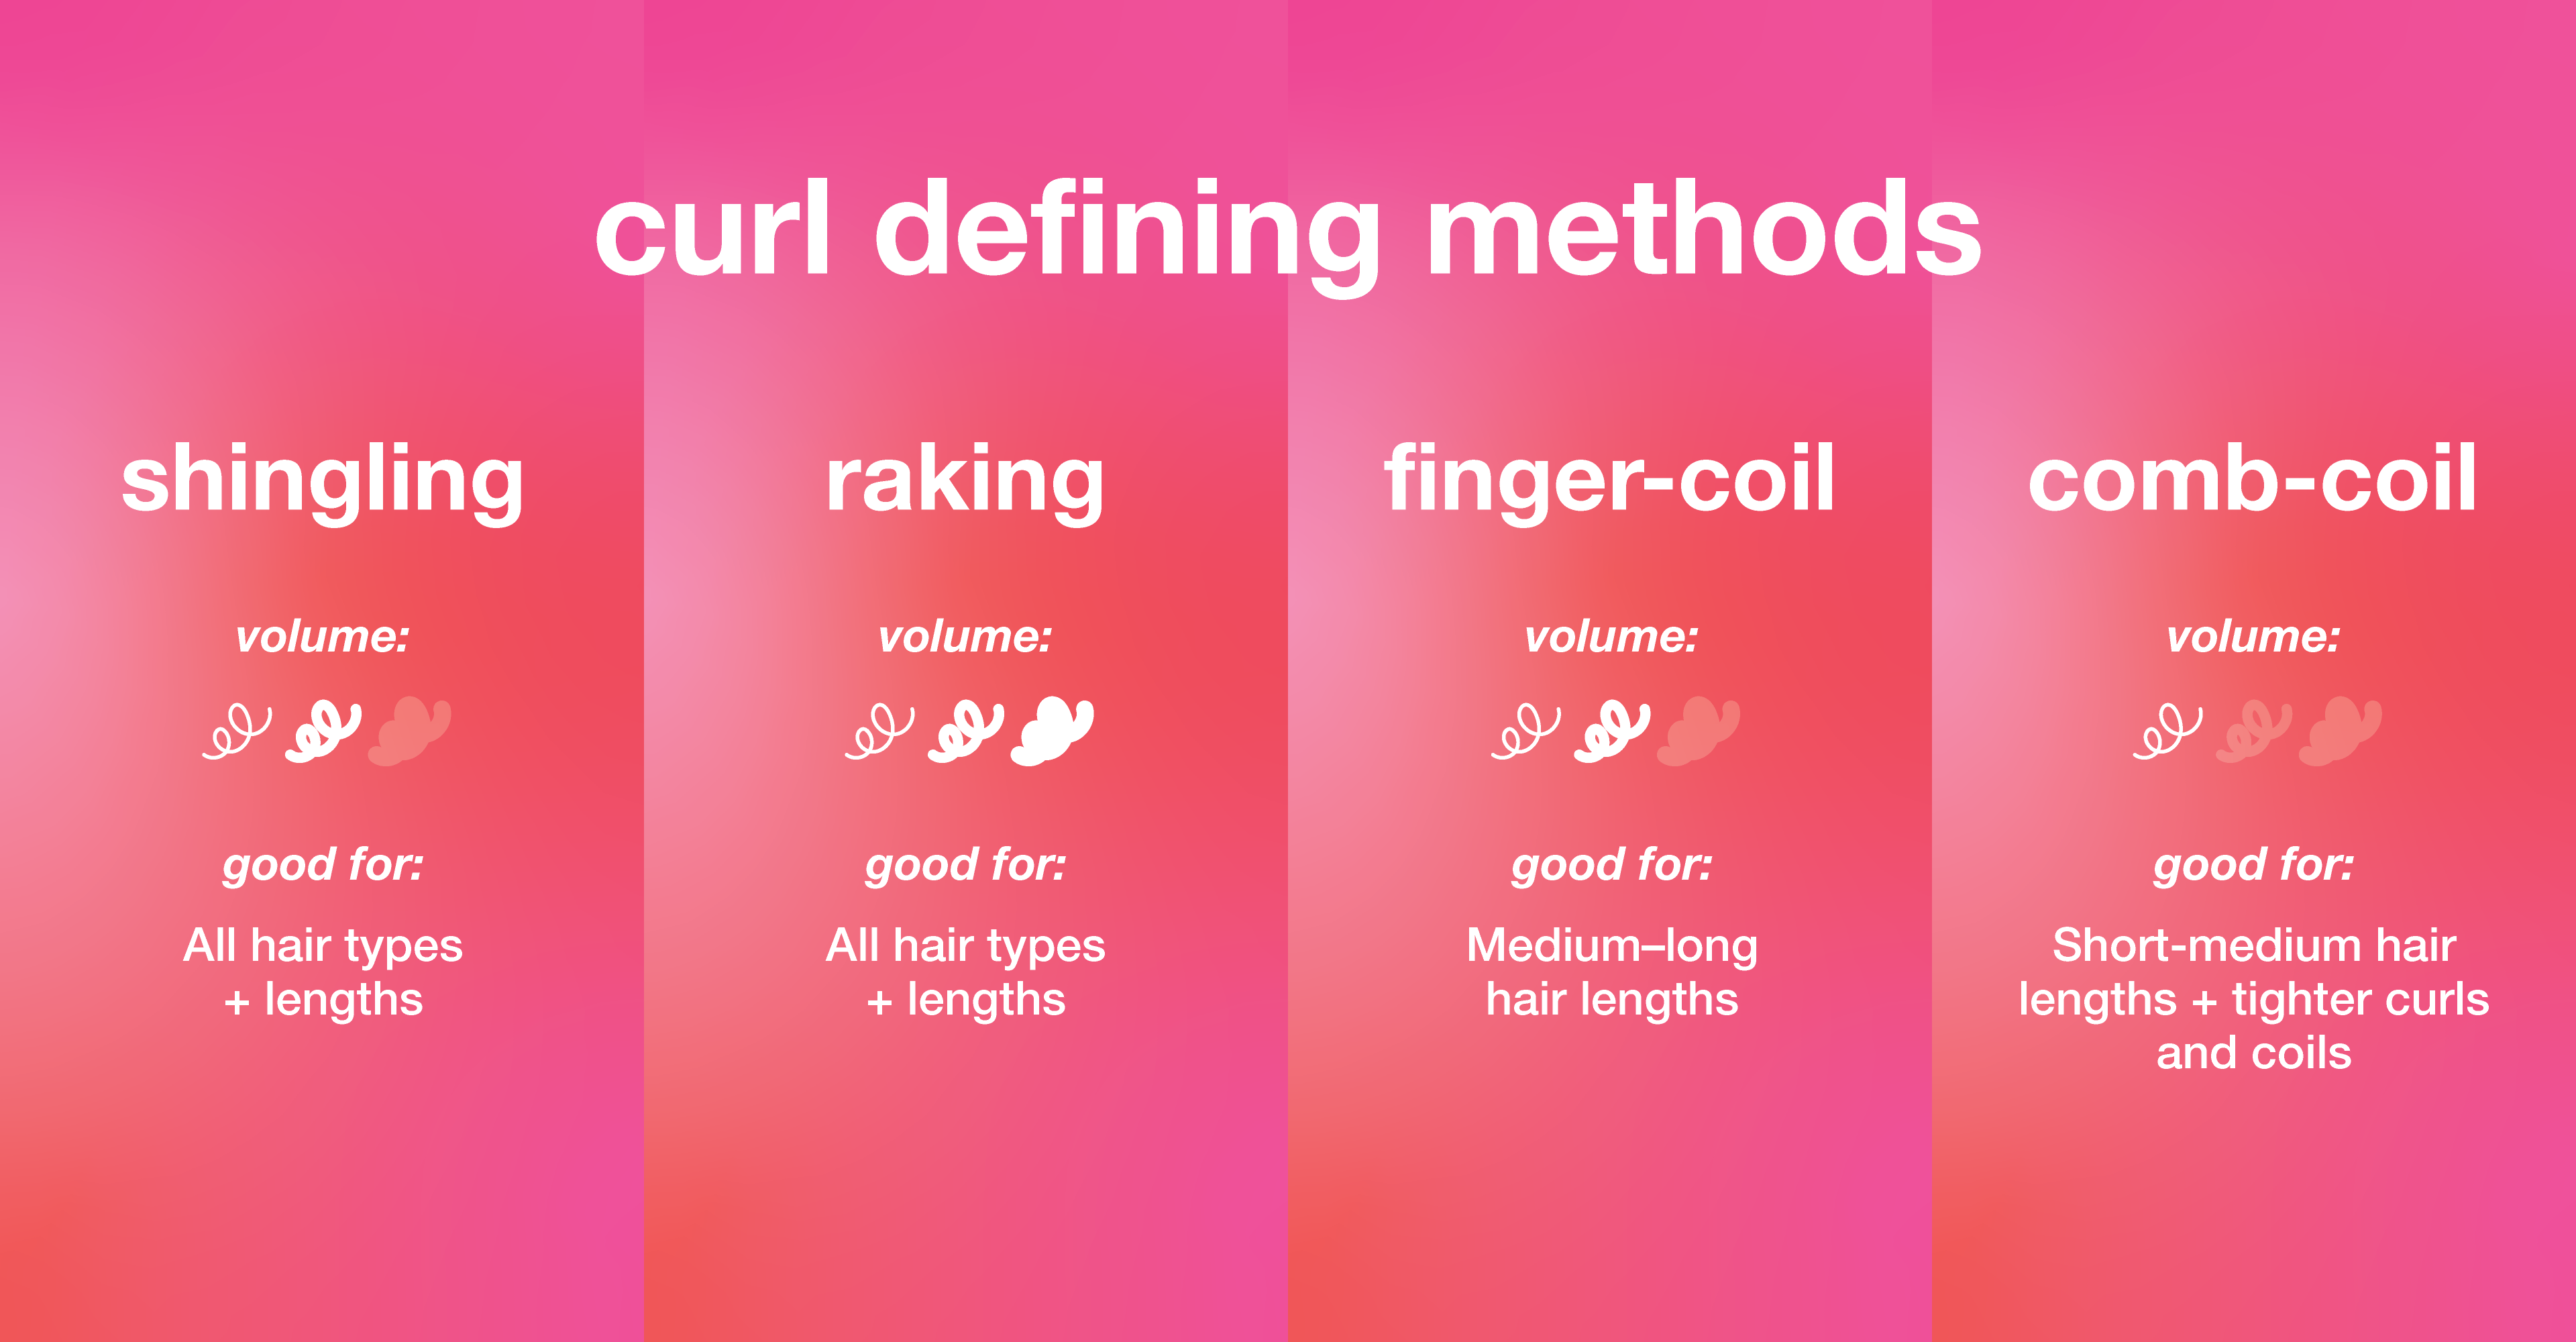
shingling
This method works by separating strands that would typically curl onto each other for organic definition and moderate volume. You can create this look on any hair type and length—even the TWA lengths.
Depending on the curl or coil size, take a ¼” - ½” section. The smaller the individual curl/coil, the smaller the section size.
Using your index finger and thumb, smooth the curl product onto each section from the base to the ends until it feels smooth.
Repeat this process until all sections are complete.
Air dry or use a diffuser to set the style.
For more volume, separate the dry curls or coils.
raking
If your client is on a time crunch, this might be the style to go for. This method is similar to shingling, but not as precise so you can create this look in less time. Named for the way your fingers rake through the hair, you can create voluminous, elongated curls + coils on all curl types.
Take ½“-1” sections, and work curl product through the hair from the roots to the ends.
Rake curl product through each section. Use 2 fingers for more clumpy, defined curls, and 3 fingers for a less defined, more voluminous look.
Lift your hair at the roots, and gently shake to let the curls + coils fall into their natural shape.
Air dry or use a diffuser to set the style.
For more volume, gently lift their hair at the roots.
finger-coil
This method will create soft, uniform, elongated spiral curls, just by using your fingers! It delivers minimal-moderate volume depending on how you separate your client’s strands, and works best on medium to long hair lengths.
Apply curl product to the whole head of hair.
Depending on the curl or coil size, take a ¼” - ½” section and twirl it around your finger starting at the base until the end of the strand.
Repeat this process until all of their hair is coiled.
Air dry or use a diffuser to set the style.
For more volume, separate the dry curls or coils.
comb-coil
Similar to finger coils, this curl-defining method creates tighter spiral curls with (you guessed it) a comb. That means this style works great on short-medium hair lengths and tighter curls + coils. It may take more time to create these consistent curl spirals, but the results are so worth it.
Depending on the curl or coil size, take a ½”-1” square section of hair and apply curl product. Gently detangle.
Take a small or medium-sized tooth comb, and insert the tip at the base of the hair section.
Spin the comb 360 degrees while it’s in the hair, moving it downwards until you reach the ends.
Repeat this process until all of the hair is coiled.
After all the sections are complete, air dry or use a diffuser to set the style.
extend their style
Your client’s hair is now styled, so how do they keep their look going at home? I recommend my clients to:
Plop or put their hair in a pineapple style to maintain their volume. They can flip their hair over and shake all of their curls + coils forward. Wrap the sides and back of their head with a scarf to keep their style in place.
Sleep with a satin bonnet or pillowcase to avoid frizz-causing friction.
Refresh curls + coils with the steam from the shower or a light mist of a leave-in.
Once their style has lost hydration and looks dry and frizzy, it’s time for another wash day—aka another expression moment.
x Alifia, Curly-Coily Expert + K18 Educator
Check back for more curly-coily chats, we’re going all the way.
 Previous